
Installing Kali Linux: Get Started with Ethical Hacking and Pentesting

Kali Linux is a powerful, specialized operating system built for ethical hacking, penetration testing, and cybersecurity tasks. It comes preloaded with tools that cater to various security testing needs.
This guide will walk you through the detailed installation process, including system requirements, machine recommendations, and setup instructions.
Time to Read: Approximately 15-20 minutes.
Time to Complete Actions:
Preparing the Bootable USB:
15-30 minutes (depending on download speed and tools used).Installing Kali Linux: 30-60 minutes (including boot configuration and setup).
Post-Installation Setup: 15-20 minutes.
Total estimated time for setup: 1.5 to 2 hours (including reading and actions).
Table of Contents
Introduction to Kali Linux
Overview of Kali Linux and its purpose in ethical hacking and cybersecurity.
Part 1: Recommended Computers for Kali Linux
Understanding system requirements for Low-End, Standard, and High-End setups.
Recommended laptop models, including detailed specifications of the Lenovo ThinkPad T480.
Part 2: Preparing for Installation
Explanation of ISO files and their role in creating a bootable USB.
How to determine your system’s architecture (64-bit vs. 32-bit).
Step-by-step guide to downloading the correct ISO file.
Part 3: Create a Bootable USB Drive
Requirements for the USB drive (minimum size: 8 GB).
Formatting and preparing the USB drive.
Tools for writing the ISO to the USB (Rufus, Etcher).
Part 4: Installing Kali Linux
Booting from the USB and accessing the boot menu.
Step-by-step installation process, including partitioning and user setup.
Part 5: Post-Installation Setup
Updating the system and installing additional drivers.
Recommended utilities to enhance workflow and system performance.
Need Help? Have Questions?
How to get support and resolve issues during installation or setup.
Part 1: Recommended Computers for Kali Linux
Before you install Kali Linux, it’s important to know if your computer can handle it. Kali Linux has different system requirements depending on how you plan to use it. Choosing the right setup will ensure smooth performance and usability.
System Requirements:
The installation requirements for Kali Linux will vary depending on what you would like to install and your setup. Here are the basic requirements:
Low-End Setup: Requires 128 MB of RAM (512 MB recommended) and 2 GB of disk space. This setup does not include a graphical desktop and is suitable for lightweight tasks like running a basic SSH server.
Standard Setup: Requires 2 GB of RAM and 20 GB of disk space. This setup includes the Xfce4 desktop environment, which provides a simple, lightweight, and easy-to-use graphical interface, making it ideal for beginners and general cybersecurity tasks.
High-End Setup: Requires 8 GB of RAM or more and 20 GB or more of disk space. Designed for resource-intensive applications like Burp Suite, analyzing large web applications, or running multiple tools simultaneously.
Recommended Laptop for Kali Linux:
When performing on-site testing, it’s crucial to use a laptop that blends in and doesn’t attract unnecessary attention. A flashy or overly customized machine can raise suspicion or undermine the purpose of your work. Instead, opt for a reliable, low-profile laptop that is effective yet discreet.
Older Lenovo ThinkPad models, particularly those manufactured in 2018 or earlier, are highly recommended for this purpose. These machines are known for their reliability, strong Linux compatibility, and practical design features that are often missing in modern laptops.
ThinkPads from 2018 and earlier come with several advantages, such as replaceable batteries, legacy ports (e.g., Ethernet and multiple USB-A ports), and sturdy keyboards. These features make them ideal for cybersecurity tasks, whether you’re conducting penetration tests, analyzing networks, or running multiple virtual machines.
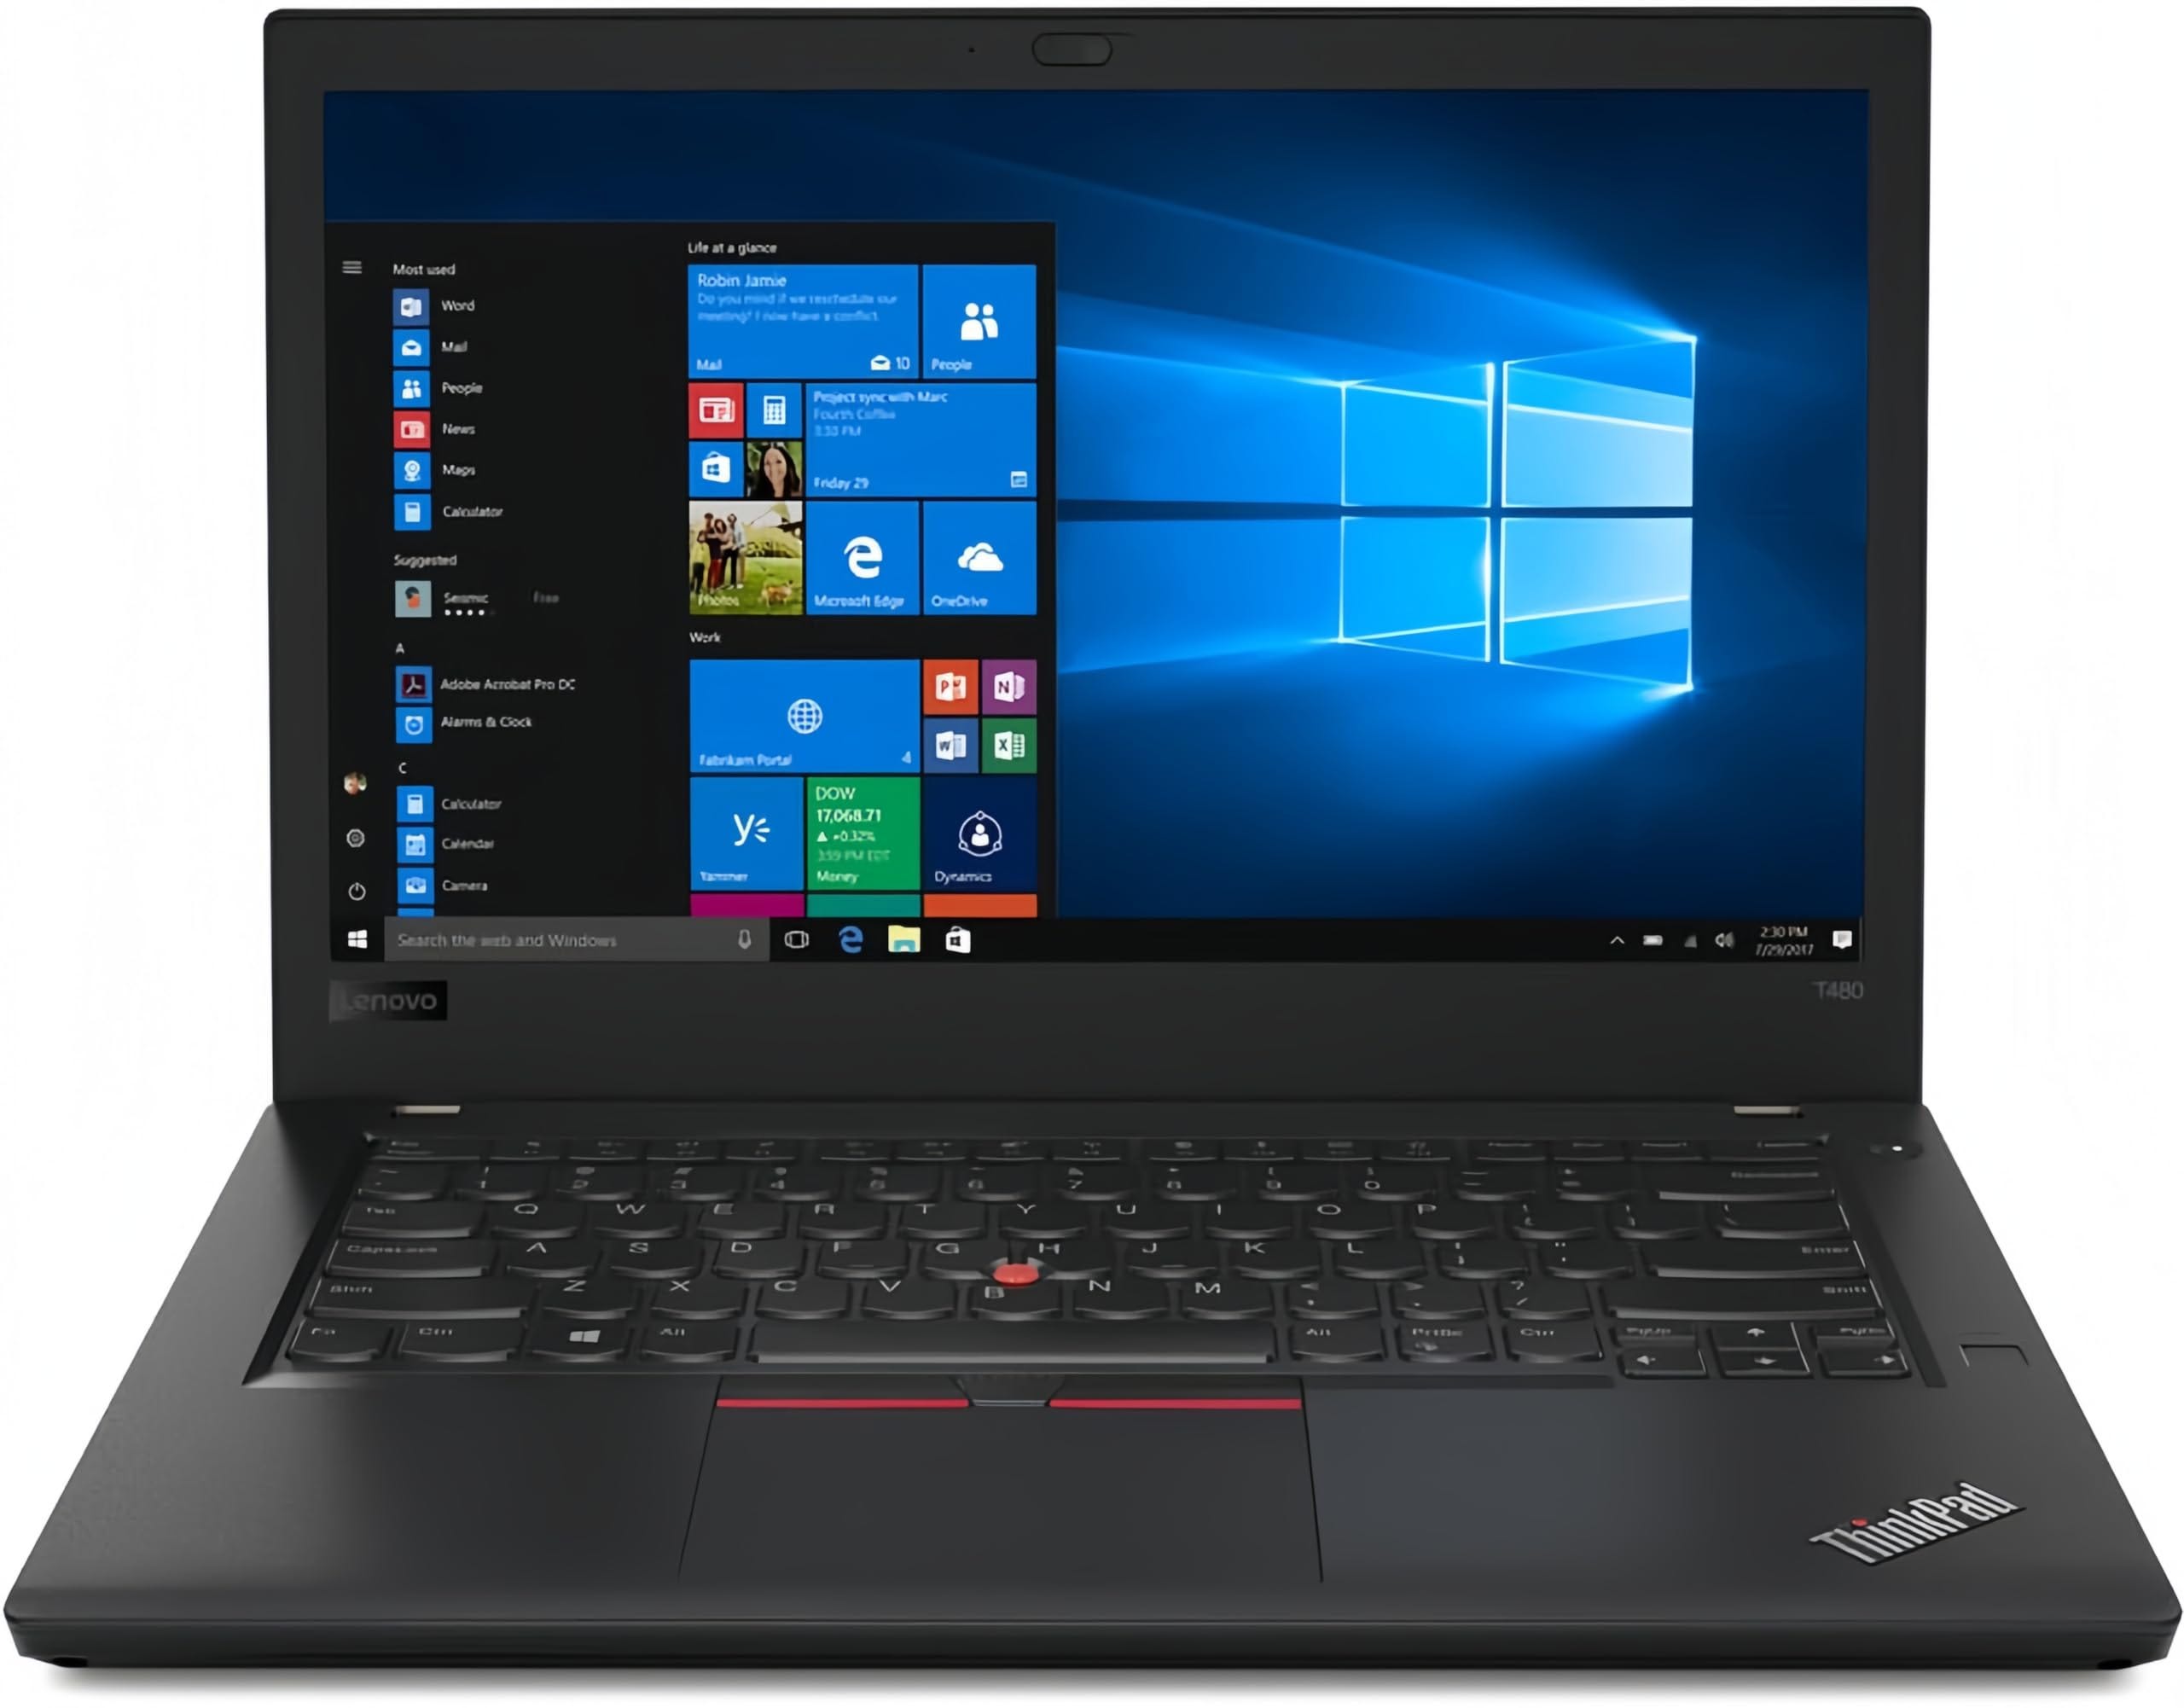
One of the best options in this category is the Lenovo ThinkPad T480 (2018). This model offers a great balance of affordability, performance, and durability, making it an excellent choice for both professionals and beginners. Its hardware is fully compatible with Kali Linux, and it supports Wi-Fi chipsets essential for advanced network security testing.
Key specifications of the Lenovo ThinkPad T480 include:
Processor: Intel Core i5 or i7 (8th Gen) for smooth multitasking and efficient operation of security tools.
RAM: 8 GB, upgradeable to 16 GB, for running resource-intensive applications or multiple virtual machines.
Storage: 256 GB SSD, providing fast boot times and quick data access.
Networking: Supports Wi-Fi hacking with compatible chipsets, crucial for wireless penetration testing.
Priced around $209 on Amazon, the T480 provides exceptional value. Its combination of reliability, performance, and compatibility makes it a top choice for building a powerful and discreet cybersecurity setup.
Part 2: Preparing for Installation
To create a USB drive that can act as an installation disk for Kali Linux, you will need to create a bootable drive out of an ISO file.
An ISO file is a complete image of a disc, containing all the data needed to install an operating system. For Kali Linux, the ISO file acts as a digital version of an installation DVD, which you’ll use to create a bootable USB drive. This USB drive will enable you to install Kali Linux on your computer.
However, before downloading the ISO file, you must ensure it matches your computer’s architecture—64-bit or 32-bit. This choice is critical for compatibility and performance.
What Does 64-bit vs. 32-bit Mean, and Why Is It Important?
The terms 64-bit and 32-bit refer to how a computer’s processor (CPU) handles data. This matters because the operating system must match the architecture of the CPU.
64-bit:
Designed for modern systems.
Can handle large amounts of RAM (more than 4 GB), making it ideal for multitasking and running resource-heavy applications.
Offers better performance and efficiency.
32-bit:
Used in older systems.
Limited to 4 GB of RAM, which restricts performance.
Suitable only for basic tasks and lightweight applications.
If you install a 64-bit version of Kali Linux on a 32-bit machine, it won’t work. Conversely, installing a 32-bit version on a 64-bit machine will work but won’t utilize the system’s full potential. This is why identifying your system’s architecture is crucial before downloading the ISO.
How to Determine Your System’s Architecture
On Windows:
Press
Windows + Rto open the Run dialog.Type
msinfo32and press Enter.In the System Information window, look for System Type:
If it says
x64-based PC, your computer is 64-bit.If it says
x86-based PC, your computer is 32-bit.
On Mac:
Click the Apple menu in the top-left corner and select About This Mac.
Check the Processor or Chip:
If it says Intel Core 2 Duo, i3, i5, i7, or newer, your Mac is 64-bit.
If it says Intel Core Duo or Core Solo, your Mac is 32-bit.
Macs made after 2008 are almost always 64-bit.
Downloading the Correct Kali Linux ISO
Once you’ve identified your system’s architecture:
Visit the Kali Linux downloads page.
Choose the Installer ISO that matches your system:
Download the 64-bit ISO for 64-bit systems.
Download the 32-bit ISO for 32-bit systems.
(Optional) You can verify the ISO file’s integrity by checking its SHA256 checksum to ensure it hasn’t been tampered with.
Part 3: Create a Bootable USB Drive
To install Kali Linux, you’ll need a bootable USB drive. Make sure the USB drive is at least 8 GB in size to accommodate the Kali Linux ISO and its installation files. Here’s how to prepare it:
Before writing the ISO, you’ll need to format the USB drive to ensure it’s ready for use.
Format the USB Drive
Windows: Open File Explorer, right-click on the USB drive, and select "Format." Choose FAT32 as the file system and click "Start."
Linux/Mac: Use Disks (Linux) or Disk Utility (Mac) to format the drive to FAT32.
Write the ISO to the USB
Use a tool like Rufus or Etcher to create the bootable USB:
Rufus (Windows): Download and open Rufus. Select your USB drive, click "Select" to choose the Kali Linux ISO, and start the process.
Etcher (Windows/Mac/Linux): Open Etcher, select the Kali Linux ISO, choose the USB drive as the target, and click "Flash."
Once complete, your bootable USB drive will be ready for installing Kali Linux.
Part 4: Installing Kali Linux
With the bootable USB drive prepared, you’re ready to install Kali Linux on your computer. Follow these steps carefully to ensure a smooth installation.
Step 1: Boot from the USB
To start the installation, you need to boot your computer from the USB drive instead of the internal hard drive. Here’s how to do it:
Identify the Correct Boot Menu Key
Each computer manufacturer uses a specific key to access the boot menu. This key allows you to select the device from which the system will boot. Common boot menu keys include:
F2: Dell, Acer
F12: Lenovo, HP
ESC: ASUS
DEL: MSI, some older systems
If you’re unsure, you can check your computer’s manual, look for a message during startup (e.g., “Press F12 for Boot Menu”), or search online for your specific model and “boot menu key.”
Access the Boot Menu and Change Boot Order
Insert the bootable USB drive into your computer.
Restart the computer.
As the system starts, repeatedly press the correct boot menu key until the boot menu appears.
In the boot menu, use the arrow keys to navigate and select the USB drive.
If the USB drive doesn’t appear in the boot menu, you may need to adjust the boot order in the BIOS/UEFI settings. Here’s how:
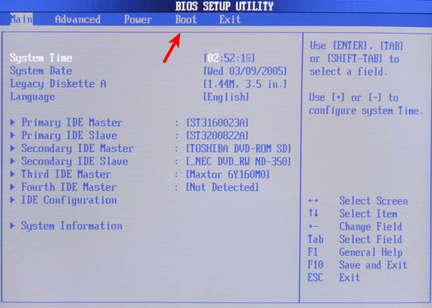
Enter the BIOS/UEFI to Change Boot Order
Restart your computer and press the BIOS/UEFI key (usually F2, DEL, or ESC) during startup.
In the BIOS/UEFI menu, look for the Boot or Boot Order tab.
Use the arrow keys to move the USB drive to the top of the boot order list.
Save the changes and exit (usually by pressing F10).
Your computer will now prioritize booting from the USB drive.
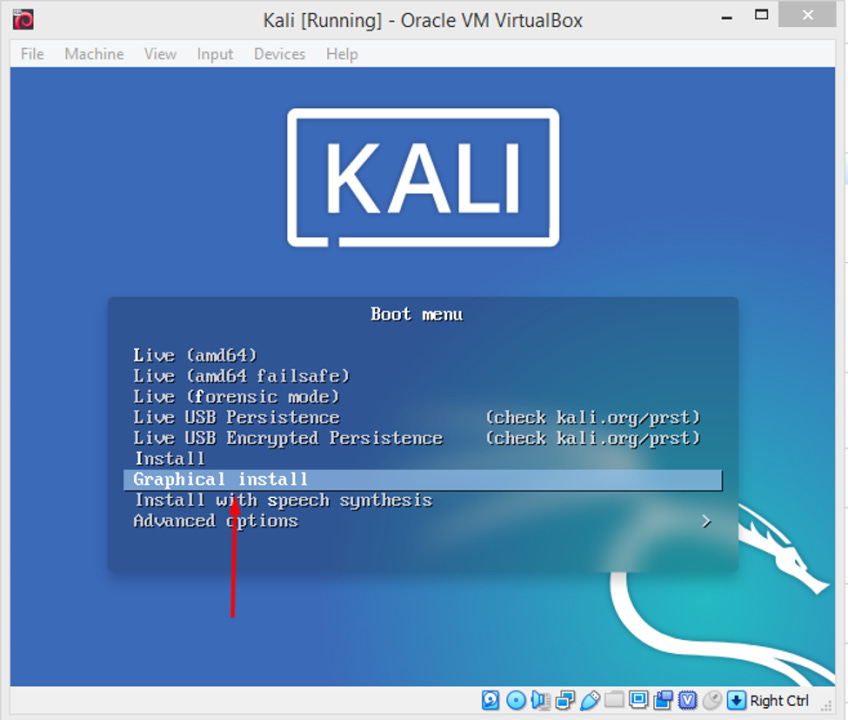
Step 2: Begin the Installation Process
On the Kali Linux boot screen, choose "Graphical Install" or "Install" for a user-friendly setup.
Select your preferred language, region, and keyboard layout.
Step 3: Configure the Network
During installation, Kali will prompt you to configure your network settings:
If using Wi-Fi, select your network and enter the password.
Alternatively, connect via Ethernet for a stable connection.
Step 4: Partition the Disk
You’ll be prompted to partition your disk. For most users, the "Guided - Use Entire Disk" option is recommended. If you plan to dual-boot with another OS, select "Manual" and allocate space accordingly.
Step 5: Set Up User Accounts
Create a root password (optional for advanced users).
Set up a non-root user account with a strong password. This will be your primary login for Kali.
Step 6: Install the System
The installer will copy files and install necessary packages. This process may take some time, depending on your system speed.
Step 7: Complete Installation
Once the installation is complete, you’ll be prompted to remove the USB drive and reboot the system. Kali Linux will boot into your newly installed environment.
Part 5: Post-Installation Setup
Step 1: Update the System
Updating your system ensures you have the latest tools, security patches, and bug fixes. To update, open a terminal and run:
sudo apt update && sudo apt upgrade -yThis will refresh the package list and upgrade any outdated software.
Step 2: Check for Additional Drivers
Some hardware, like Wi-Fi adapters or graphics cards, may require proprietary drivers to function properly. Signs that you might need additional drivers include:
Wi-Fi not working or not detecting networks.
Incorrect screen resolution or sluggish graphics performance.
Bluetooth or other peripherals not functioning.
To install common drivers, open a terminal and run:
sudo apt install firmware-linuxIf you need specific drivers, refer to your hardware manufacturer’s website or Kali Linux’s official documentation for guidance.
Step 3: Explore and Install Additional Utilities
Kali Linux comes with many tools pre-installed, but you can always explore more based on your needs. To browse available packages, you can:
Visit the Kali Tools website for a categorized list of tools.
Use the terminal to search for tools:
apt search <tool-name>Check Kali’s official documentation to learn about recommended utilities for specific tasks. Installing additional packages is simple.
For example, to install a new tool, run:
sudo apt install <tool-name>Completing these steps ensures your Kali Linux system is ready for efficient and effective use. Stay curious, explore the wide range of available tools, and tailor your setup to fit your cybersecurity needs.
Congratulations for making it this far! With Kali Linux installed and set up, your machine is now ready for ethical hacking and penetration testing.
By using a compatible computer and following the steps outlined in this guide, you’ll have a robust and reliable system to explore the world of cybersecurity. Stay tuned for further guides on using Kali’s powerful tools to enhance your skills!
Need Help? Have Questions?
If you encounter any issues or have questions about installing or using Kali Linux, we’re here to help!
To get help, leave a comment below with your concerns, whether it’s about system requirements, creating a bootable USB, or troubleshooting the installation process.
Our community and support team are ready to provide guidance and ensure you’re set up for success. Don’t hesitate to reach out—we’ve got your back!